Image module
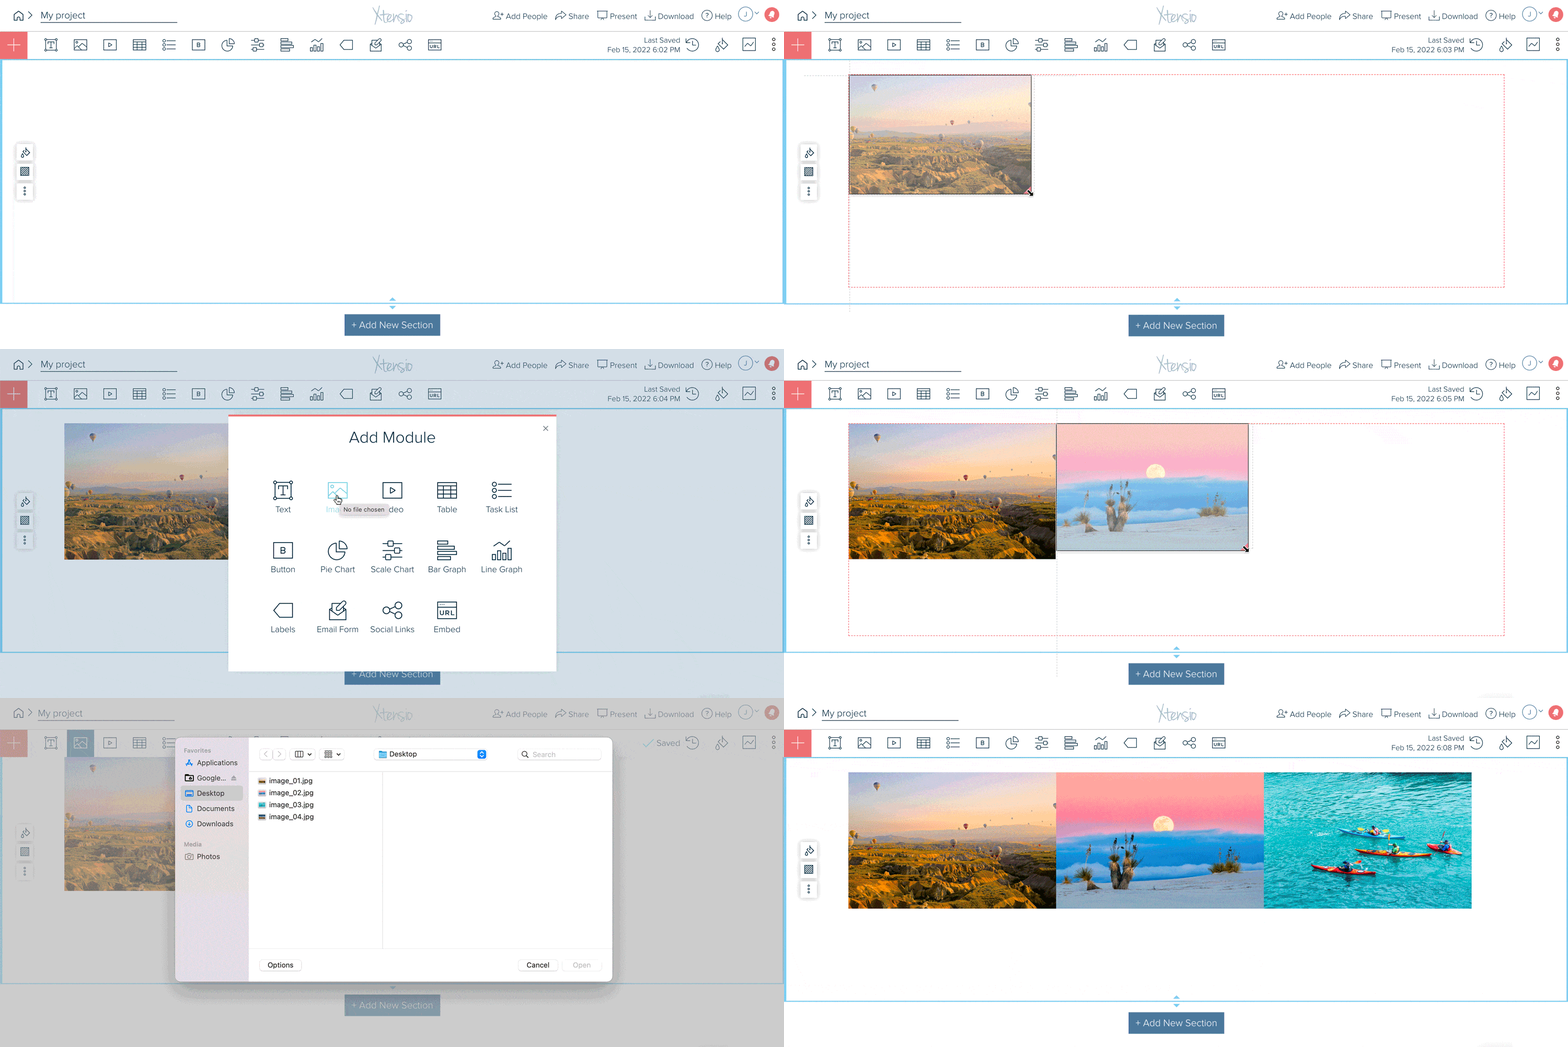
You can add images to your folios with PNG, JPG, or SVGS files. To replace an existing image in a template or example, click the “upload image’ icon on the module menu and choose an image from your computer.
There are four different ways to add new images to your folios:
- Copy and paste an image file from anywhere on the web.
- Insert an image module via the “+” icon at the top left of the editor.
- Add a new image by clicking the image module icon on the default toolbar state.
- Insert an image by dragging and dropping the image module from the default toolbar state.
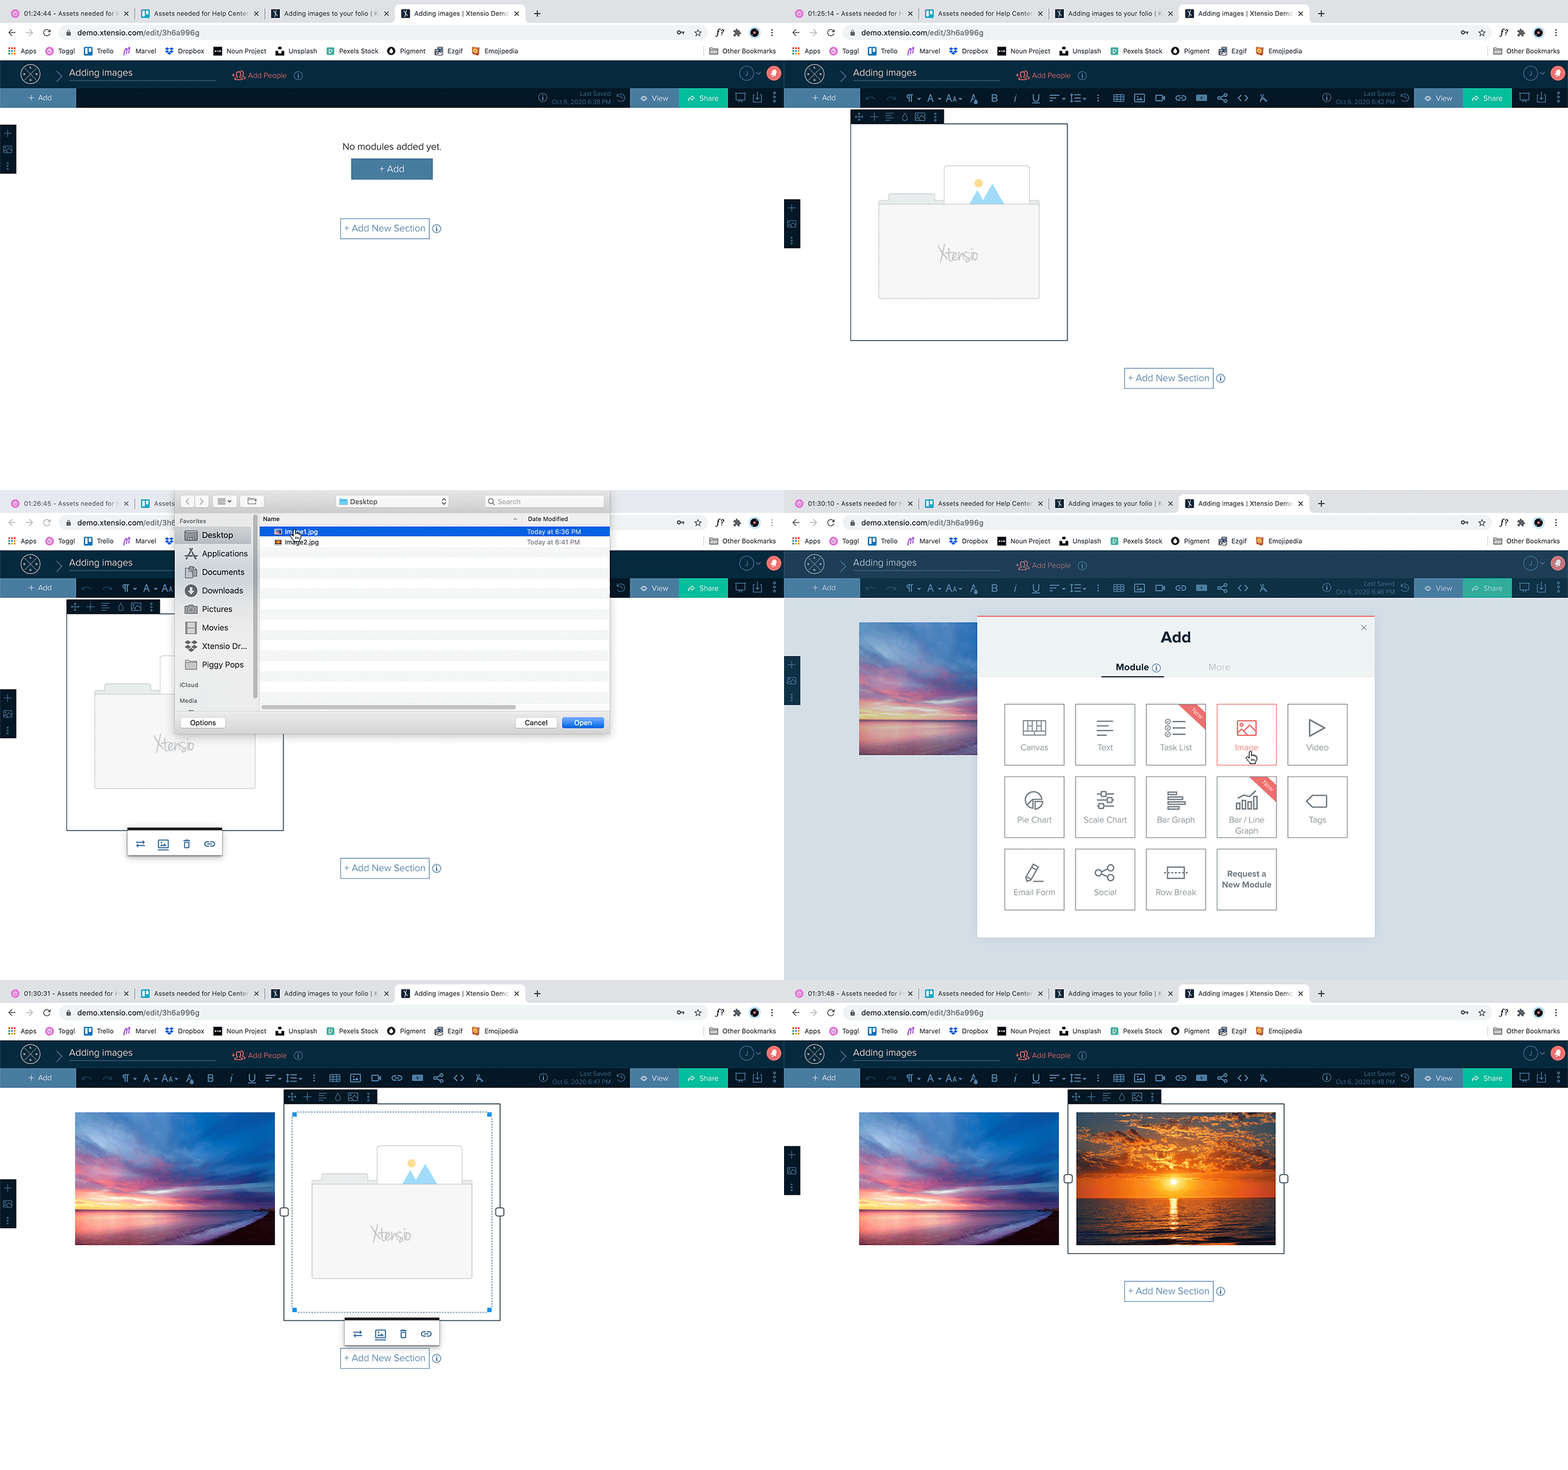
On the older version of the editor (dark blue toolbar), there are two different ways to add images to your folios.
- You can insert an image module via the “Add +” icon at the top left of your edit screen, the “+” icon at the top left of each canvas, or the “+” icon on the floating menu at the right of the section.
- On the module pop-up, select the “image module,” then you can click on the pencil icon to upload an image from your desktop or the link icon to enter a URL to the image.
- You can also insert an image into any text module via the “insert image” icon on your toolbar. Just place your cursor inside the text module where you’d like the image to go and select “insert image” on your toolbar to upload an image.
And you’re able to add background images behind each element in the folio. Learn more about working with modules here and your toolbar here.
Here are other things you can do with modules using the menu at the top left of each content block:
- Move and resize modules
- Add a module background image or color
- Change module color scheme
- Duplicate modules
- Share modules
- Export modules
- Delete modules

